WireSock VPN Gateway: Quick Start Guide for Windows Desktop
Streamline Your Secure Connection with WireGuard and WireSock
Installation Options
For a streamlined installation experience, we offer two package manager options:
Chocolatey (Recommended for Windows 10/11)
- Install using Chocolatey with:powershell
choco install wiresockvpngateway
- Install using Chocolatey with:
Winget
- Ensure you have the latest version of Winget.
- Install using Winget with:powershell
winget install NTKERNEL.WireSockVPNGateway
Manual Installation
Install WireGuard Client To begin securing your network, if you don’t already have WireGuard installed, download and install the latest WireGuard Windows Client. This simple step ensures you have the foundational software needed for a secure connection.
Install WireSock VPN Gateway Next, enhance your network capabilities by downloading and installing the appropriate WireSock VPN Gateway installer for your target platform. Choose the installer that corresponds to your system architecture to ensure optimal performance.
Configuration
Setup WireGuard Server
To configure your server, start a command prompt as Administrator and execute the following command:
wg-quick-config -add -startBe sure to record the UDP port number displayed, as it will be crucial for later steps. The screenshot below provides a visual guide through the menu you will navigate.
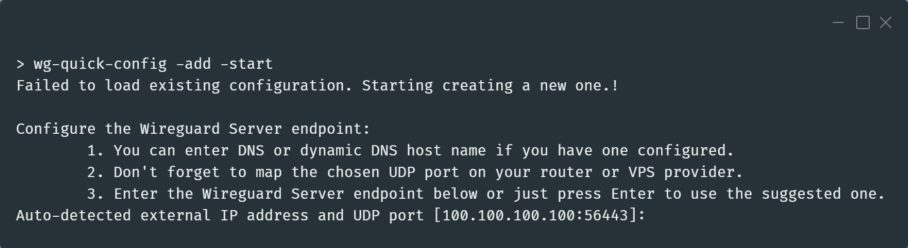
Carefully follow the prompts to configure your WireGuard server endpoint. Remember to note the UDP port—it is essential for your VPN’s functionality.
Port Forwarding
For a seamless connection, set up port forwarding by consulting the port forwarding guide specific to your home router or VPS provider. Proper configuration here is key to ensuring your VPN is accessible from outside your local network.
Troubleshooting
Encountering issues? If you face any challenges with your VPN after installation or updates, a system reboot can often resolve these problems. Should the difficulties persist, reach out for support by posting a message in our dedicated