Corporate VPN Setup Guide Using WireSock VPN Client
Introduction
In today's digital landscape, data security is a top priority for any organization. A Virtual Private Network (VPN) provides a secure connection between employees and corporate resources, regardless of their location. This guide will help you set up a corporate VPN using the WireSock VPN Client, based on the WireGuard protocol, ensuring high performance and security.
Requirements
Before starting the installation, ensure you have the following:
- Server running Windows, Linux, or macOS.
- Client Devices with support for the WireSock VPN Client.
- Internet Connection with sufficient bandwidth.
- Administrative Privileges on both the server and client devices.
- WireGuard Installed on the server (if using WireGuard).
Step 1: Installing WireGuard on the Server
Download WireGuard:
- Visit the official WireGuard website and download the latest version for your operating system.
Install WireGuard:
- Follow the installer instructions for your OS.
Generate Keys:
- Open a terminal or command prompt and execute the following commands:bash
wg genkey | tee privatekey | wg pubkey > publickey - This will create a PrivateKey and PublicKey for the server.
- Open a terminal or command prompt and execute the following commands:
Step 2: Configuring the Server Configuration File
Create the Configuration File:
- Typically named
wg0.conf, place it in the/etc/wireguard/directory on Linux or the appropriate directory on Windows/macOS.
- Typically named
Sample
wg0.confConfiguration:ini[Interface] PrivateKey = <your-private-key> Address = 10.0.0.1/24 ListenPort = 51820 DNS = 1.1.1.1, 8.8.8.8 [Peer] PublicKey = <client-public-key> AllowedIPs = 10.0.0.2/32- PrivateKey: Server's private key.
- Address: Server's IP address within the VPN network.
- ListenPort: Port for client connections.
- DNS: DNS servers for clients.
- PublicKey: Client's public key.
- AllowedIPs: Client's IP address.
Start WireGuard:
- On Linux:bash
sudo wg-quick up wg0 - On Windows/macOS, use the WireGuard interface to import the configuration and activate the tunnel.
- On Linux:
Step 3: Installing WireSock VPN Client on Client Devices
Download WireSock VPN Client:
- Visit the official WireSock website and download the client for your operating system.
Install the Client:
- Follow the installer instructions.
Step 4: Configuring the Client Configuration File
Generate Keys for the Client:
- Open a terminal or command prompt on the client device and execute:bash
wg genkey | tee client_privatekey | wg pubkey > client_publickey - Save the PrivateKey and PublicKey for the client.
- Open a terminal or command prompt on the client device and execute:
Create the Client Configuration File:
ini[Interface] PrivateKey = <client-private-key> Address = 10.0.0.2/24 DNS = 1.1.1.1, 8.8.8.8 [Peer] PublicKey = <server-public-key> AllowedIPs = 0.0.0.0/0, ::/0 Endpoint = <server-ip-address>:51820 PersistentKeepalive = 25- PrivateKey: Client's private key.
- Address: Client's IP address within the VPN network.
- PublicKey: Server's public key.
- Endpoint: Server's IP address and port.
- AllowedIPs: Routes for tunneling traffic.
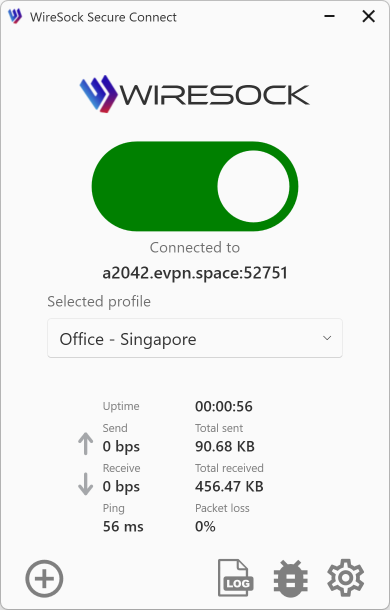
Import Configuration into WireSock VPN Client:
- Open the WireSock VPN Client.
- Import the created configuration file.
- Activate the VPN connection.
Step 5: Configuring Firewall and Routing
Open the Port on the Server:
- Ensure that port
51820(or your chosen port) is open in the server's firewall. - Example for Windows:
- Open Windows Defender Firewall.
- Create a new inbound rule for UDP port
51820.
- Ensure that port
Set Up Routing on the Server:
- On Linux, add the following rules:bash
sudo sysctl -w net.ipv4.ip_forward=1 sudo iptables -A FORWARD -i wg0 -j ACCEPT sudo iptables -A FORWARD -o wg0 -j ACCEPT sudo iptables -t nat -A POSTROUTING -o eth0 -j MASQUERADE - Save these rules to ensure they persist after a reboot.
- On Linux, add the following rules:
Step 6: Verifying the Connection
Check Server Status:
- Run the command:bash
sudo wg - Ensure the client is connected and transmitting data.
- Run the command:
Verify Access from the Client Device:
- Open a browser and visit WhatIsMyIP to check your public IP address.
- Confirm that the IP address matches the VPN server's IP.
Step 7: Additional Settings and Security
Using a Preshared Key:
- Generate a Preshared Key:bash
wg genpsk > presharedkey - Add to Both Server and Client Configurations:ini
PresharedKey = <preshared-key>
- Generate a Preshared Key:
Restricting Access by Applications:
- Use the
AllowedAppsandDisallowedAppsparameters in the WireSock VPN Client configuration to control which applications can access the VPN.
- Use the
Configuring DNS:
- Set up a corporate DNS server to resolve internal domains through the VPN.
Step 8: Management and Maintenance
Monitoring Connections:
- Regularly check connection statuses using the
wgcommand on the server. - Utilize built-in tools in the WireSock VPN Client for monitoring activity.
- Regularly check connection statuses using the
Updating Software:
- Keep WireGuard and WireSock VPN Client updated to ensure security and stability.
Backing Up Configurations:
- Regularly back up server and client configuration files to prevent data loss.
Troubleshooting
Common Issues and Solutions:
VPN Connection Fails:
- Verify the accuracy of IP addresses and ports in the configurations.
- Ensure that the firewall is not blocking the necessary ports.
No Internet Access Through VPN:
- Check routing and NAT settings on the server.
- Ensure that
AllowedIPsare correctly configured.
DNS Problems:
- Confirm that DNS servers are correctly specified in the configuration.
- Verify the availability of DNS servers from the VPN network.
Conclusion
Setting up a corporate VPN using the WireSock VPN Client and WireGuard provides your organization with a reliable and secure solution for remote access to resources. By following this guide, you can ensure secure connections for your employees, enhancing both security and operational efficiency.
For more information and updates, please refer to the official WireGuard Documentation and WireSock Resources.